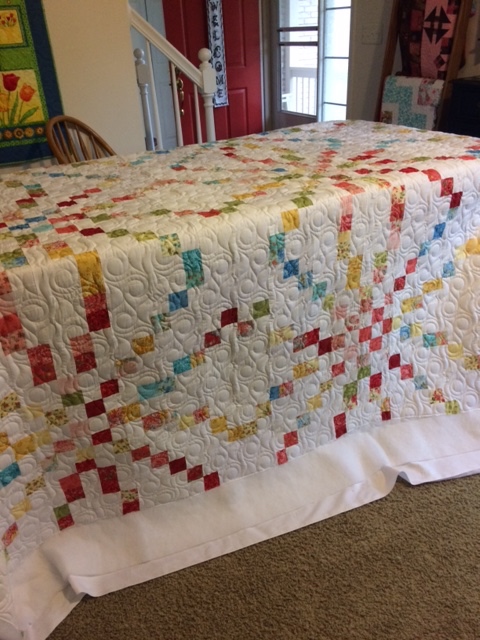
This is Connie’s Triangles theme baby quilt. The back is an ABC flannel. The quilting is Geometric B2B, pale yellow thread & Quilters Dream batting. Another cute quilt!


This is Connie’s Triangles theme baby quilt. The back is an ABC flannel. The quilting is Geometric B2B, pale yellow thread & Quilters Dream batting. Another cute quilt!
I’m finishing up come quilts I’ve had in house for a while. This is Martha’s October Lily quilt. Martha pieced this at the 2016 Quilt Retreat with Great Lakes Heritage Quilters. The quilt pattern is by Coleen Merte of Northwater Quilts. http://www.northwaterquilts.com

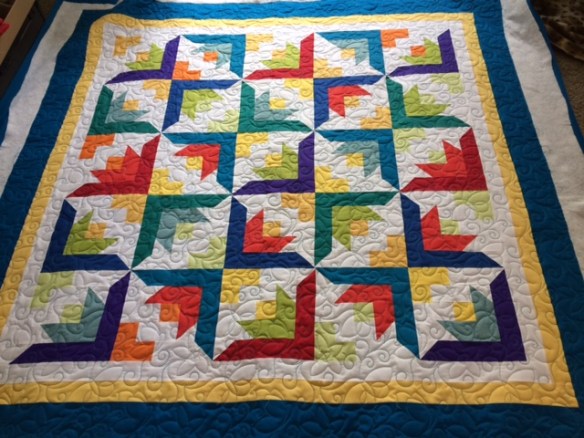
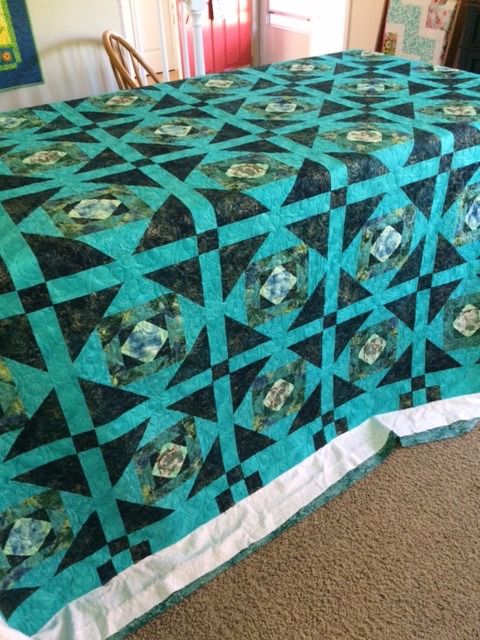
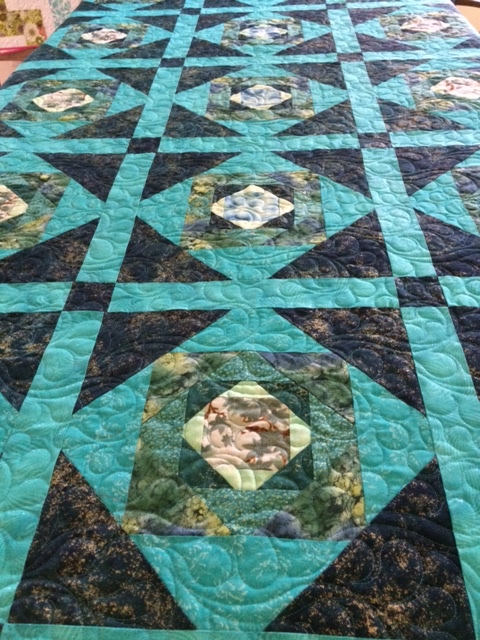
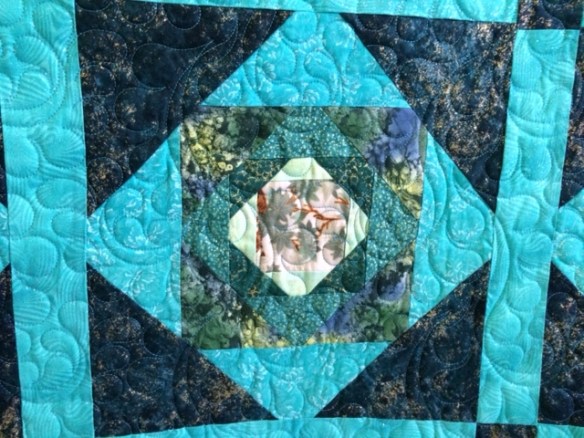
This is Martha’s Satellite quilt. One cold winter weekend we took an online mystery class with Sharon Blackmore. Sharon was using FB live to share each step from her retreat in Canada. Martha was in Mesa Az and I was at home here in MI. We texted each other during the process, sharing photo’s of our steps and got a lot of the quilt pieced that day. I still haven’t finished mine but here are photos’ of Martha’s finished quilt. It consists of 2 blocks, a 9 patch and a snowball. If you play magic eye you can see the orange star blocks it creates. The quilting design is Curling Ferns, teal thread, the batting is Hobbs 80/20 and she made a really cool pieced back with the extra blocks. Her hubby, Dean, helped pick out the retro brown and orange print for it. It was a fun project. We got to see the others working on theirs and the nice facility that they had retreat in. Thank you Sharon Blackmore for doing this for the group & sharing it on FB Live. She’s a great instructor if you’ve never taken a class from her DO IT! https://www.loveshackquilts.ca
I hope to get mine finished by the end of this month.


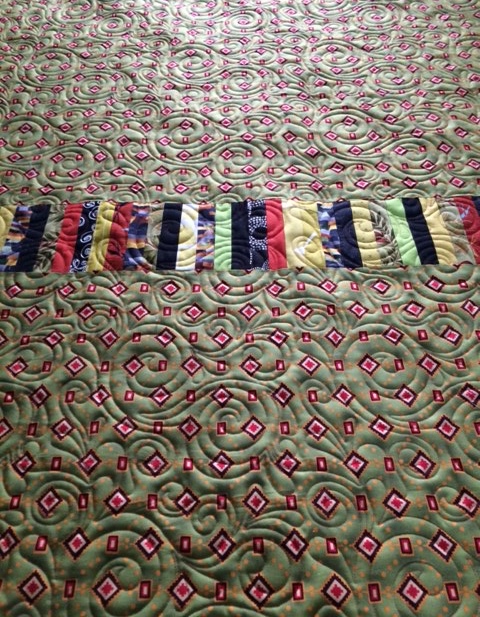
The Great Lakes Heritage Quilters held their last meeting and potluck dinner last Thursday. This years Challenge was to make a quilt using Spools.
Here are a few photos of the quilts from my Sewing Group that I quilted.
This is Amy’s Spools Quilt. The larger spools are pieced and the smaller ones are embroidery. The quilting design is Simply Squared.


This Hawaiian Wallhanging is Cathy’s. This is her first Custom quilted quilt. The thread is neon orange.


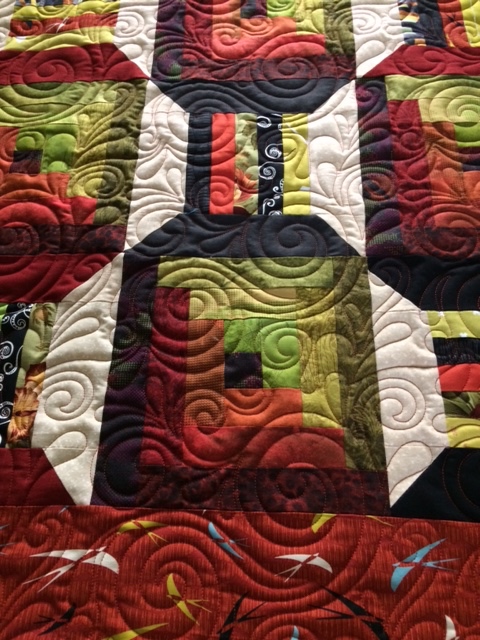
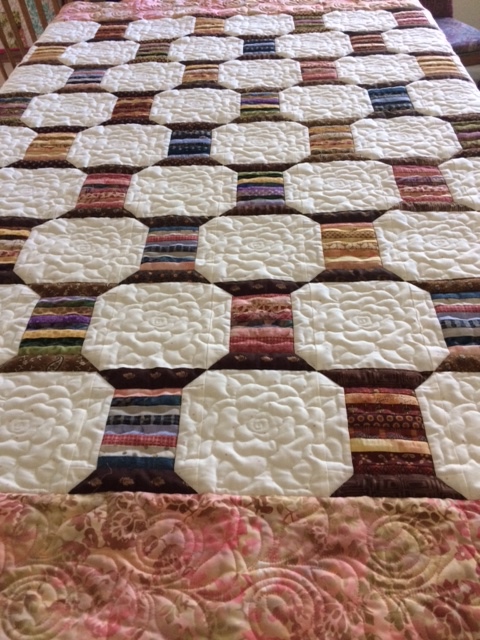
Martha’s quilt is a mix of spools and log cabin blocks. The color of her fabrics is striking in person. The quilting design on hers is Brittany B2B.

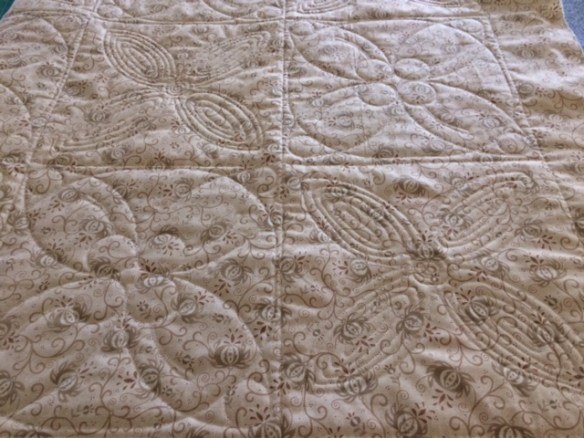
The last one is my own quilt. I pieced this top in 2011 and have stalled on quilting it. I used a digital rose that I designed and custom quilted it. It has wool batting. Its nice to finally have it finished and out of the closet.

This is Sue C’s Cuppa Wool Quilt. The pattern is a BOM by Sue Spargo. I’ve been waiting to share these photos until Sue Spargo’s pattern book comes out in accordance with the groups rules.
You can preorder the book or kit right now online at http://www.suespargo.com/index.php. It has been a lot of fun and I’ve learned so much from working on this project. I recommend her patterns & the BOM highly. She uses a lot of her special hand dyed wools and matching threads. Thats what I think makes them so special, the rich colors.
While I no longer do Custom quilting for clients, I did agree to do a handful of wool quilts for my BOM CUPPA yahoo group. I’ll be posting more of these as the year goes on. There is a lot of time & work that goes into these wall sized quilts. There is so much detail you can look at them for hours and find something new about each Cup. They are a challenge to quilt all the fill around the appliqué. I hope the quilting enhances the quilt. The backing fabric is part of the quilt too.


This is a mystery quilt designed by Bonnie Hunter for 2016. Cathy did a beautiful job piecing this & it was a pleasure to quilt. The quilting design is called Blustery Day, by Nicole Webb. The batting is Warm & White and the thread is a champaign cream.
Enjoy!


This is a Braided Irish Chain quilt by Pat L. The thread is pale peach & the batting is Hobbs Poly-down. The quilting design is Birds in the Wind.

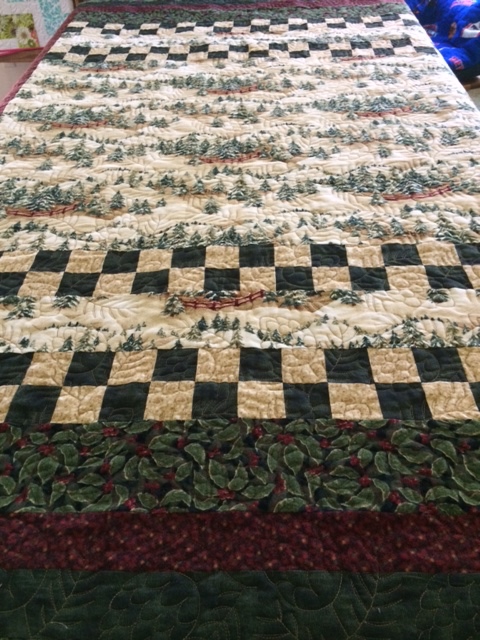
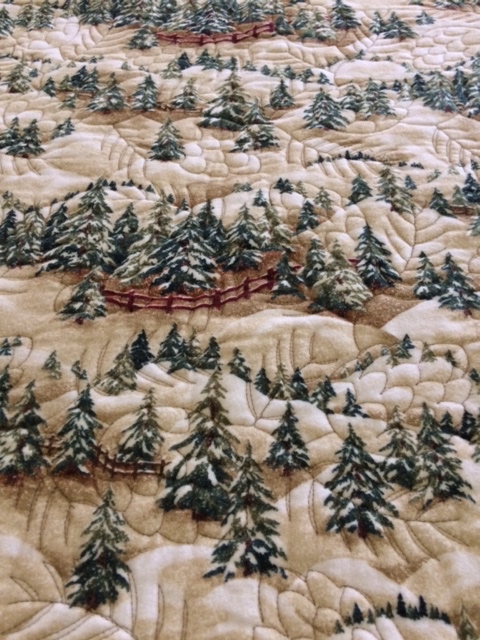
Rosemarie made this flannel quilt for her brother. It was a kit from Connecting Threads. Both the top & backing are flannel. The quilting design is Pinecones E2E, The batting is Hobbs 80/20 and the thread is a khaki gold.
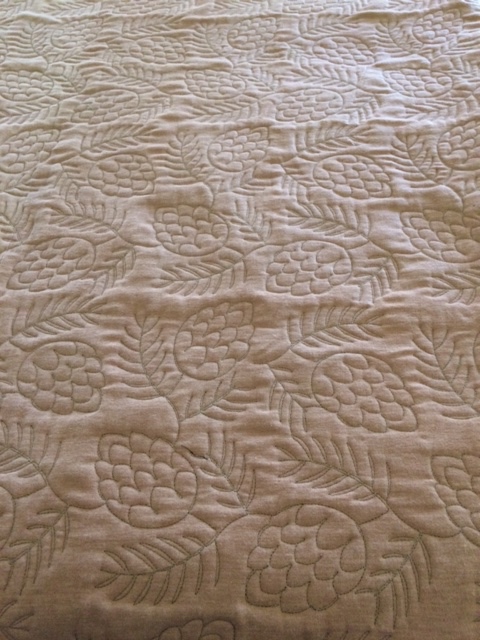
This quilt will be for Rosemarie to keep. Its a big quilt and will have a nice drop on the sides. The quilting design is Flounce, the thread is teal color and inside is Warm & White batting. This will be a very pretty quilt for her bed.

My small stitch group decided to do a Round Robin. Here’s how it worked: Each of us made a quilt block. This block would become the center of our own Round Robin Quilt. We decided on a rotation and planned to swap at our meetings. Since there were 5 of us participating we decided to allow 2 months between swaps. This was quickly changed to one month unless you found you needed more time. That turned out to be a guideline, as many of us finished sooner than expected each month.
We agreed early on to collusion, if you needed help call anyone in the group for ideas or fabric other than the owner of the quilt. This became the fun part, plotting and planning behind the scenes. We included Shirley from our group as an advisor since she always has some great ideas and really was helpful. As we added sections to each quilt we would send photos to each other, keeping it a secret from the owner of the quilt. We also found ourselves swapping fabrics & ideas.
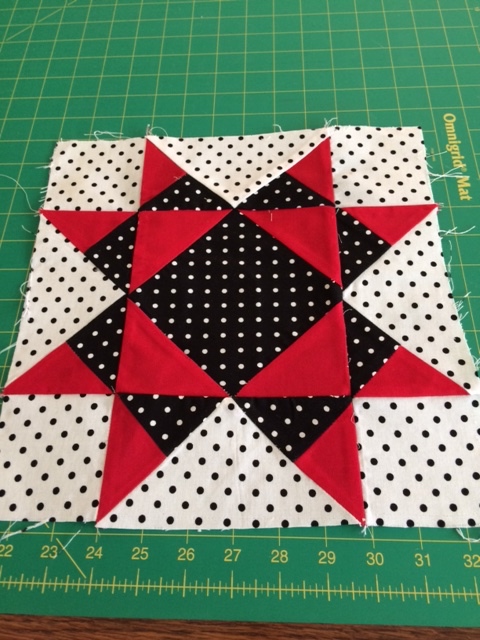
We were surprised how nice they all turned out & revealed the finished tops at one of our meetings. Here is the first one I received, Rosanne’s block. It was 12″ x 12″. I wanted her center star to be a bigger focal point and recalled a Swoon Block pattern that I had. It worked perfectly to emphasize her star.
This is her final quilt after quilting.

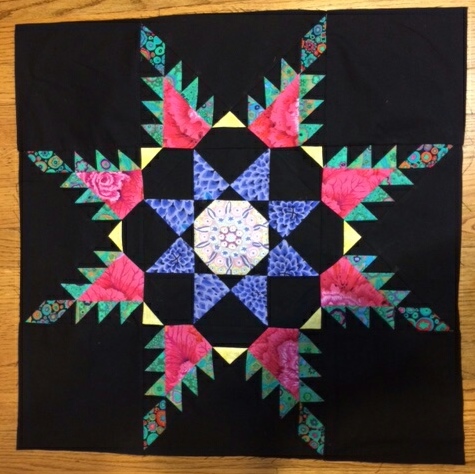
The Second quilt I received was Amy’s. She had a celtic center and Rosanne added the flying geese. I added cornerstones to her flying geese and put it on point using a cool multi hand dyed fabric I’d have had in my stash.

This is Amy’s quilt after the finished quilting.
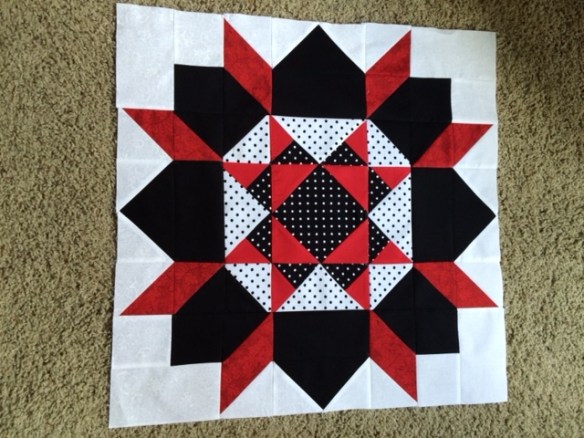
Nancy O whipped up this feathered star block out of Kaffe Faccett fabrics . Amy and Rosanne added to her block before me. My contribution is the 3 patch around the outside edge. I had just enough of this fabric to make it around her quilt, which was growing fast 70″ x 70″ . She easily turned this into a queen quilt before it was finished.
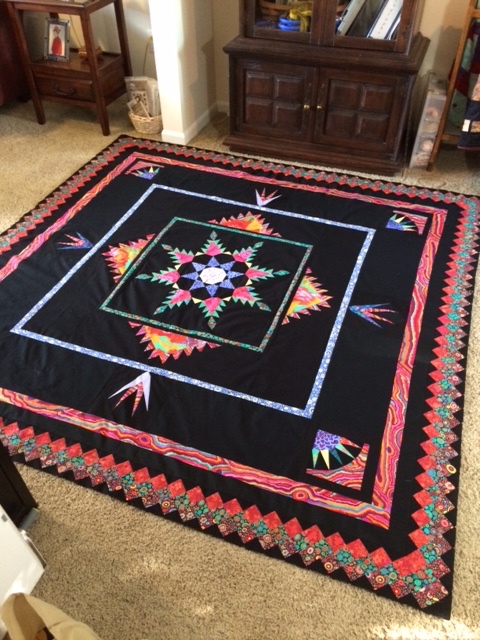
Here is Nancy O’s final quilt.

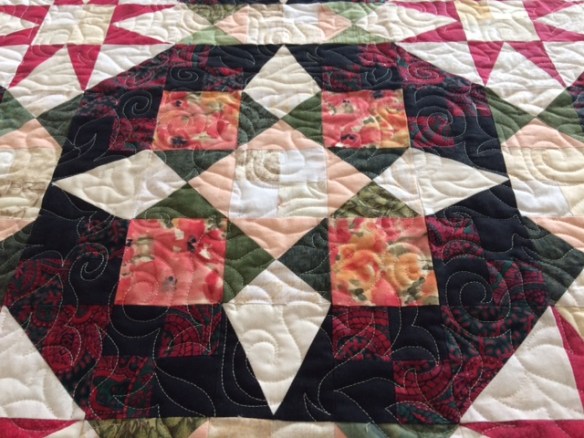
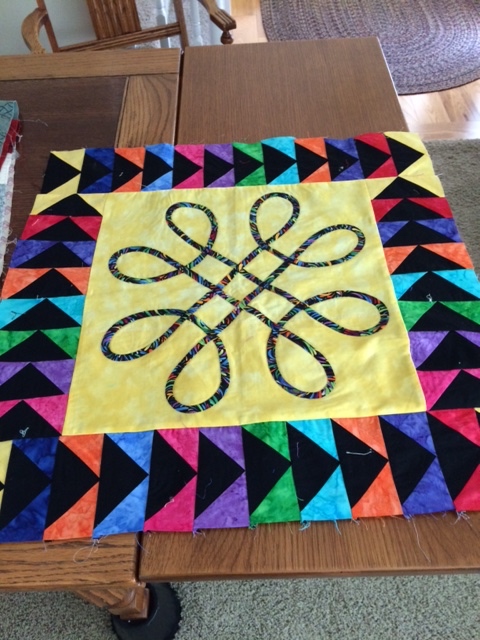
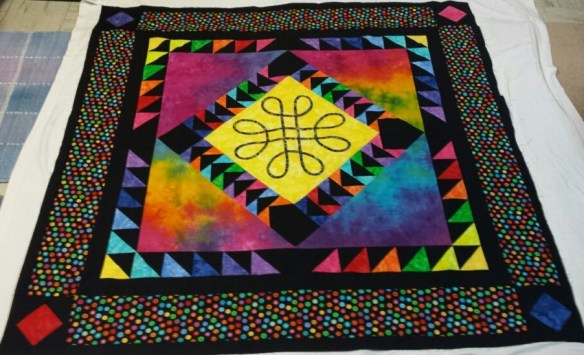
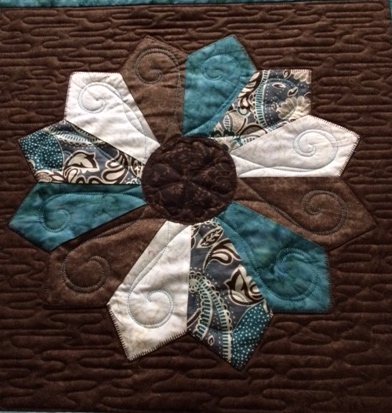
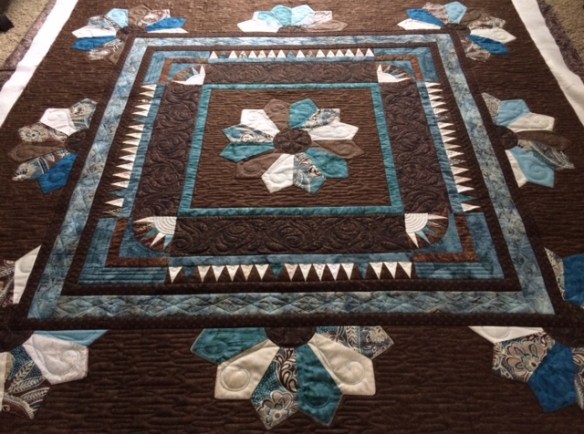
Martha had made a bunch of dresden plate blocks but never put them together for a quilt. She decided to use one for her quilt center. We found some of her fabrics tricky to match. It was purchased while on a Caribbean cruise so we couldn’t get any more of it. I was the last to work on her quilt & got the rest of her dresden plates, which had some more of this limited print fabric in them. I also got her permission to cut them and add to her quilt. This photo shows what her center block looks like before all the other details were added. Then the finished quilt.
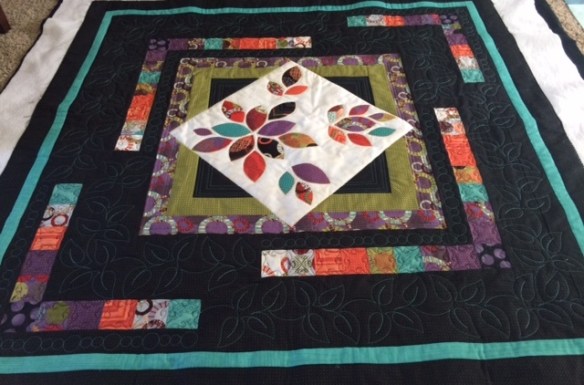
The last quilt block is my mine. I saw this block in The Practical Guild to Patchwork by Elizabeth Hartman. The quilt was called Little Leaves. I used a charm pack of fabrics by Zen Chic. I had been waiting for the right project to use it. The group found more of this fabric print to use in my quilt. I really love what they came up with.

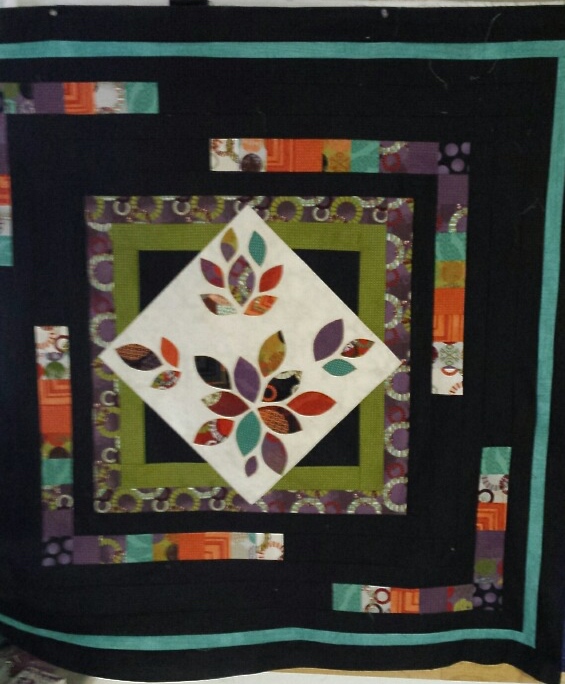
Here is my almost finished quilt. I still have some fill quilting work to complete on it.
Thank you to all that participated. It was a lot of fun. I think we all learned some new tricks along the way. Best of all, we all ended up with a beautiful quilt .
Jill’s Butterfly Quilt with Flight of Fancy quilting design, White Hobbs 80/20 batting, King Tut tone on tone thread. The blue backing is quilted with teal thread.